Yamaha Clavinova Tutorials
Exploring New Ways to Play a Standard Piano Piece
You can download a PDF or Dorico score of The House of the Rising Sun to play along with the tutorial. The Dorico file is completely editable. You can download the free Dorico SE advanced music notation software from the Steinberg website
Download PDF Score Download Dorico FileTranscript / Instructions
Let’s turn a straight solo piano performance of The House of the Rising Sun.Using the same playing, into a performance of The House of the Rising Sun with a real-time accompaniment band.
Or even explore new sounds for a performance with real-time accompaniment and organ sounds selected.
I’m Christina Kay, a piano teacher and I actively use Yamaha Clavinova in my lessons. Today, we are going to explore how to take a simple piece of piano music and then transform it easily using the Clavinova.
For this tutorial, I will be using the CVP809. However, the same procedure can be followed on the CVP805, 709 and 609.
Feel free to download the sheet music (see above) and play along.
Setting Up the Real-Time Backing Band
Here are the easy steps to add a real-time accompaniment band to your playing.
- Turn on the Clavinova.
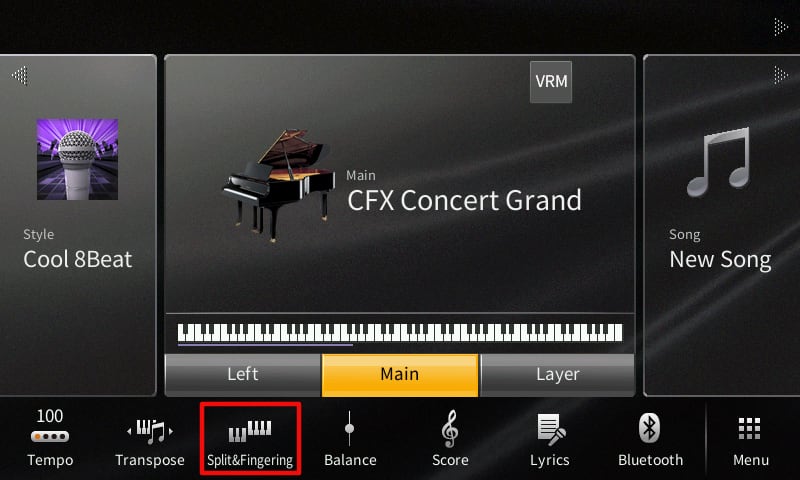
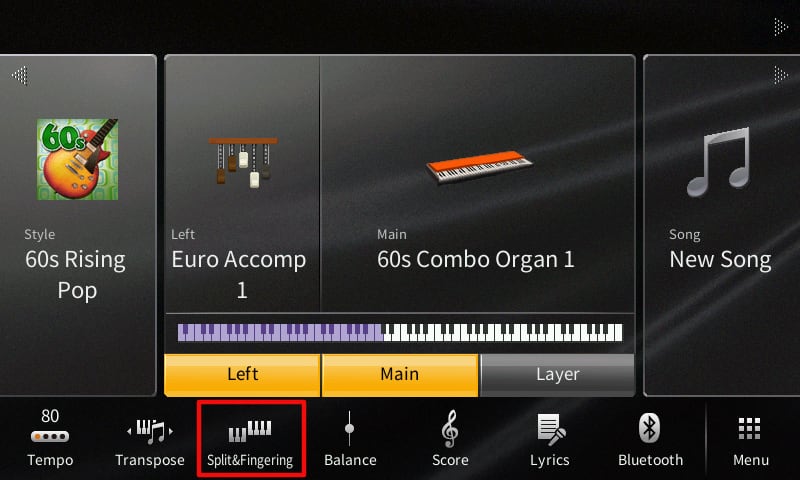
- Touch Split & Fingering at the bottom of the screen.
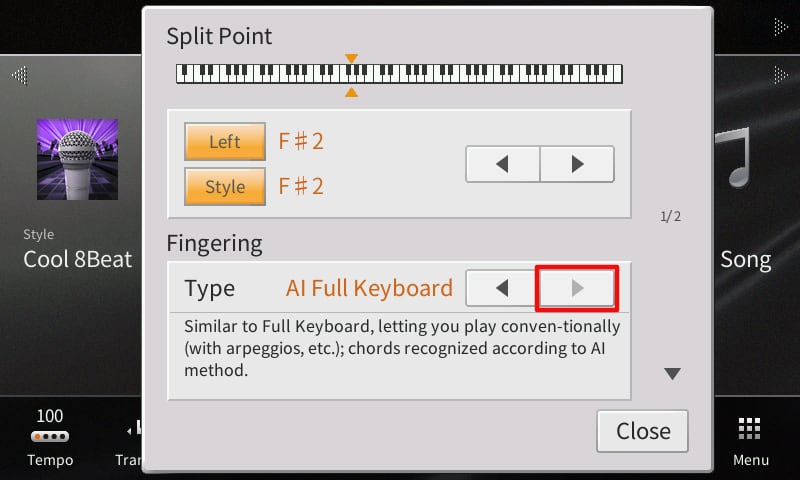
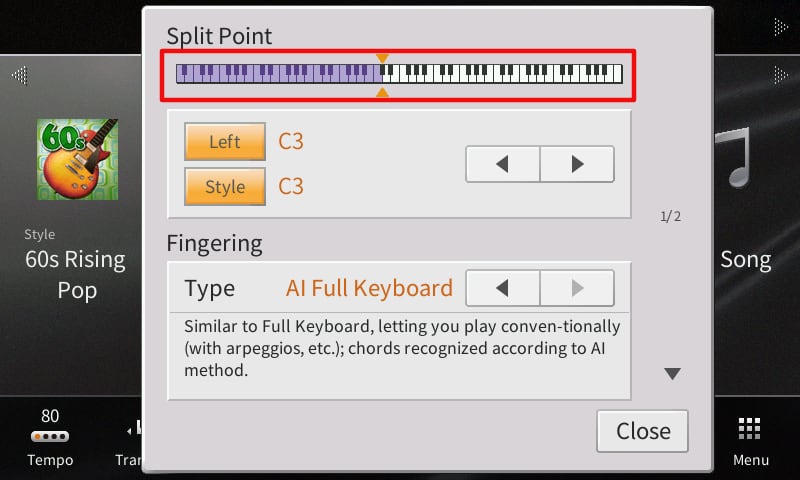
- Touch right arrow to select, Fingering Type - AI Full Keyboard.
- Press Home.
- On the panel, ensure ACMP ON/OFF is set to ON.
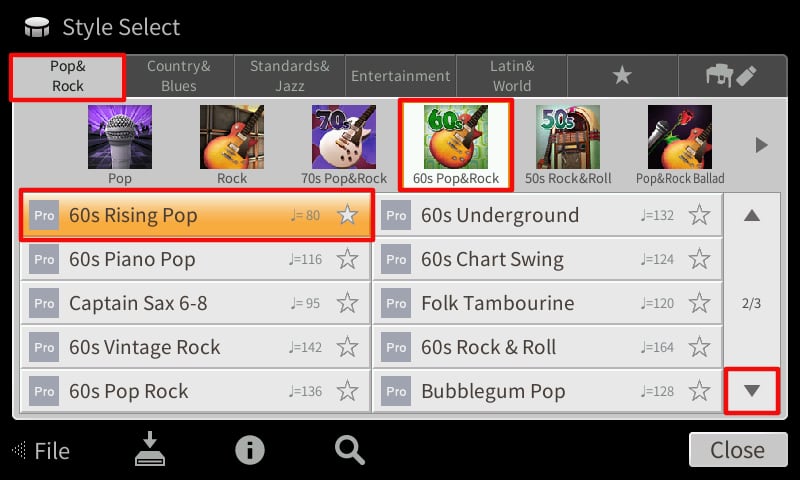
- Press POP & ROCK in the STYLE area.
- Touch 60s Pop&Rock, arrow down to page 2 / 3 and select 60s Rising Pop.
- Press Home.

Playing the Piece with Automatic Accompaniment
Now we can play the piece, using a piano sound and a live backing band that follows you. You can use the score as provided at the top of this page.
- Press Sync Start. This will start the band automatically.
- Once you start playing, press Main Variation B and C to change the style variation as indicated on the score.
- Then press Ending III to finish with a musical outro.
- Press Memory and then Registration 1 to save.
Adding More Sounds to Your Live Performance
Let’s explore using other sounds.
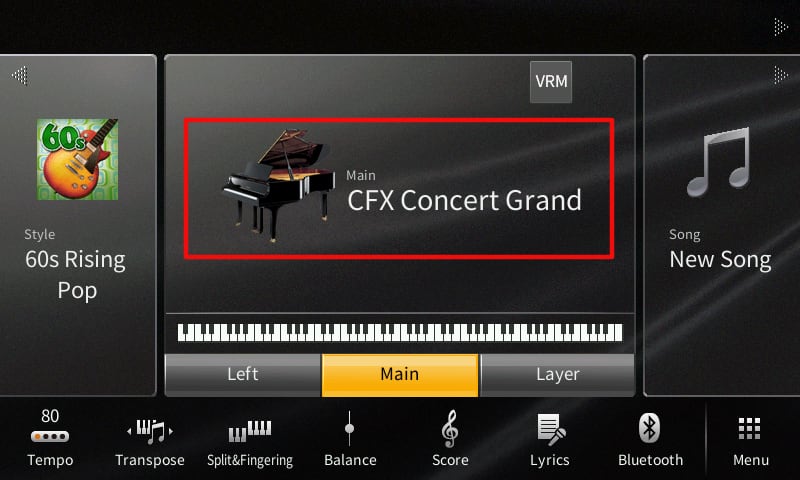
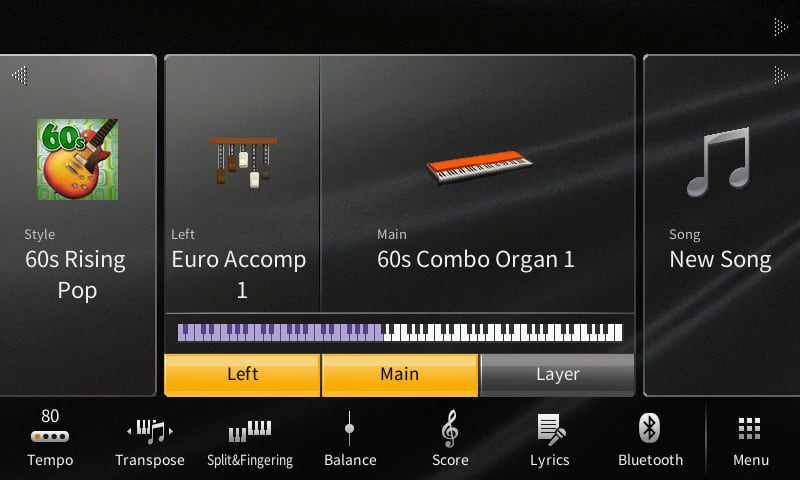
- On the main screen, touch CFX Concert Grand.
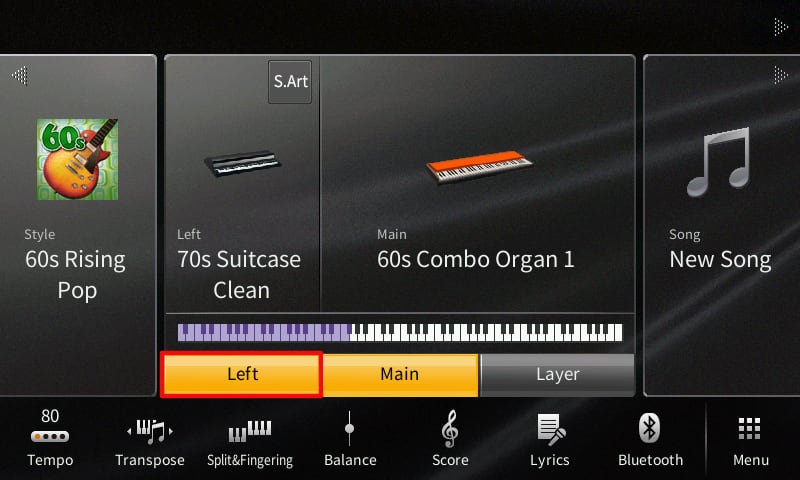
- Touch Organ, then Transistor Organ and then 60s Combo organ 1.
- Press Home to go to the main screen.
- Touch Left to turn on the left-part sound.
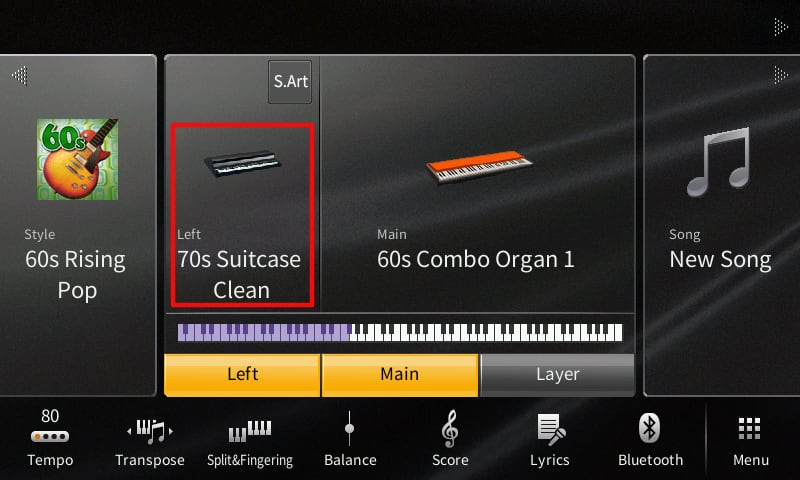
- Above left - touch the left voice.
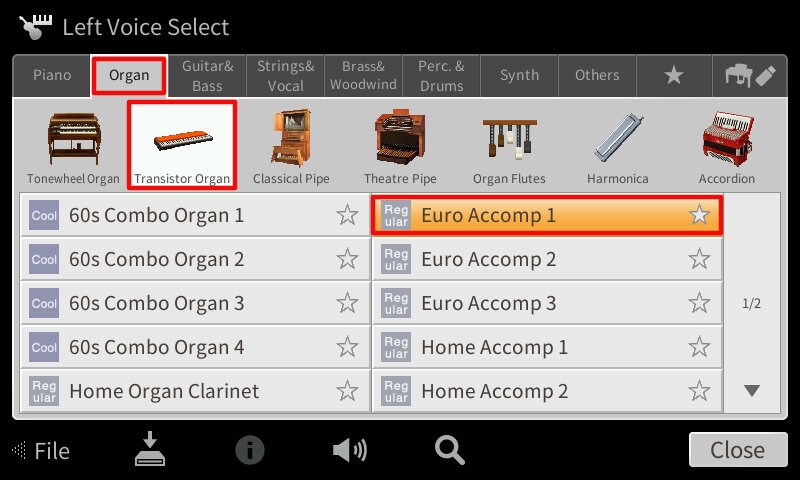
- Touch Organ, Transistor Organ and then Euro Accomp 1.
- Press Home.

Setting a Split Point
We have now selected two different organ sounds for different parts of the keyboard. We need to change the split point - where the two sounds change.
- On the screen, touch Split & Fingering.
- Change the Split point to C3 by touching and holding the Split Point keyboard up the top of the screen and pressing middle C on the piano keyboard.
- Press Home.
Playing House Of the Rising Sun with New Sounds
You can now play the piece using the new organ sounds.
- Press Variation A - ensuring that it isn’t flashing.
- Press Sync Start.
- Start Playing and enjoy! Tip - as we are using an organ sound - there is no need to use the sustain pedal function.
- To save this setup, press Memory and then Registration 2.
Using the Saved Registrations
Now that we have saved the registrations to the internal memory - we can load our setups very quickly by pressing Registration 1 or Registration 2. This time - without the Memory button.
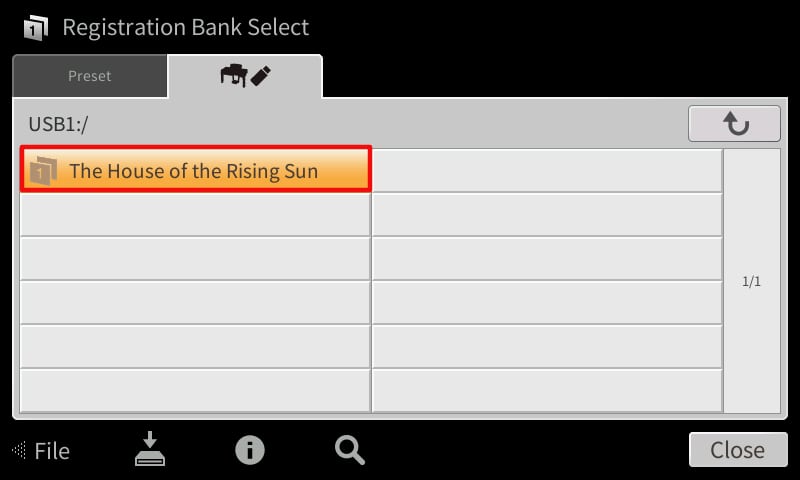
Saving the Registration Data to USB
Taking this to the final step - we can save this registration data to USB
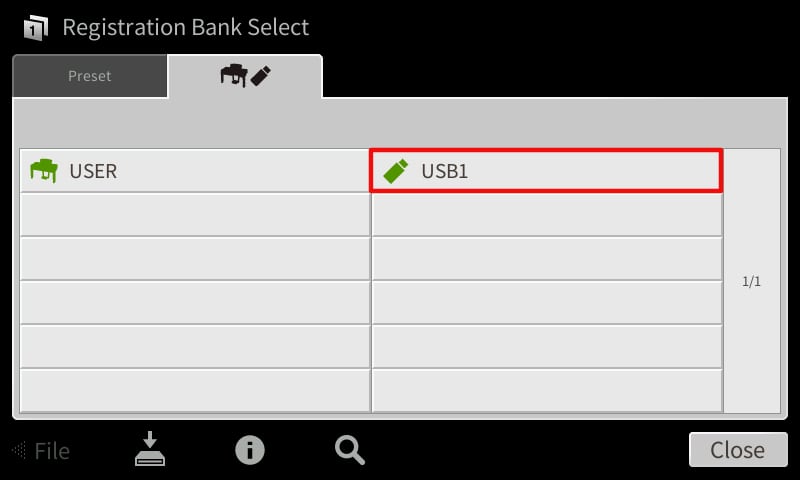
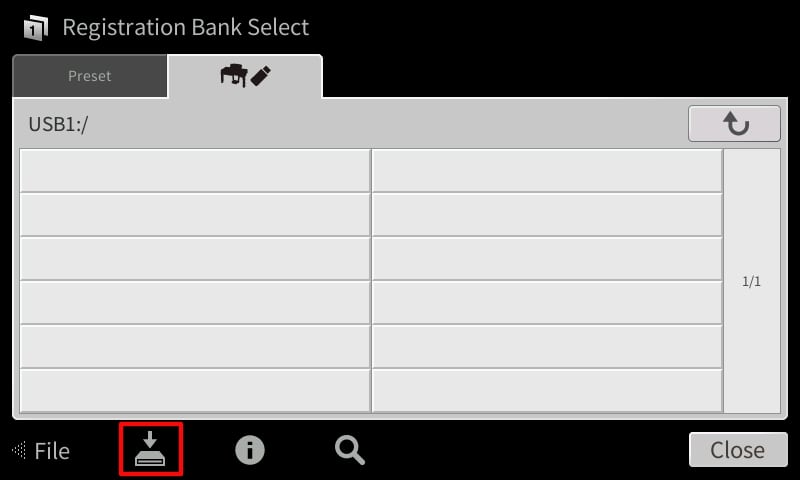
- Press REGIST BANK - & + together.
- On the screen, navigate to and touch USB1.
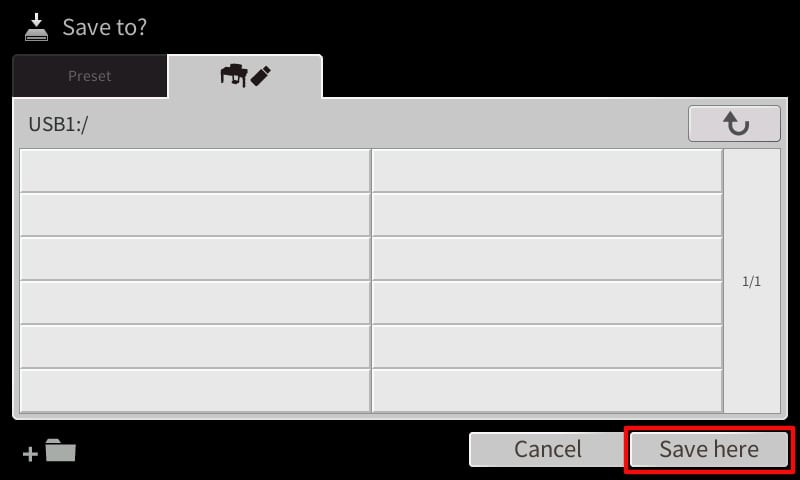
- Touch the SAVE icon.
- Touch Save here.
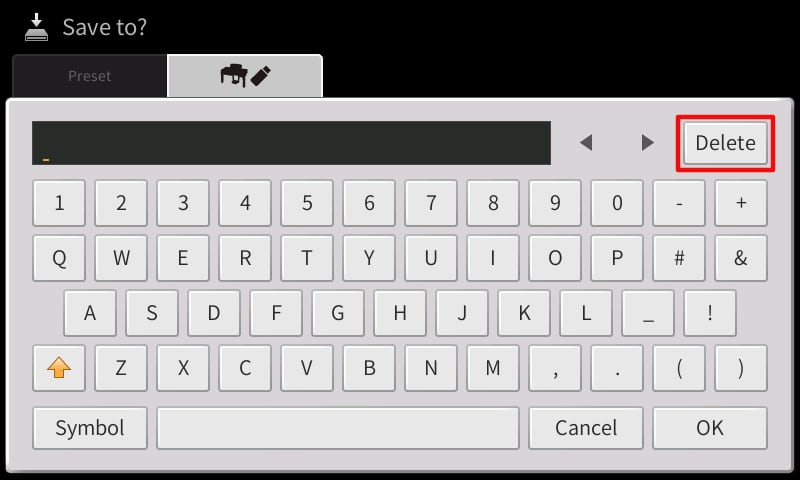
- Touch and hold Delete to enter a new name.
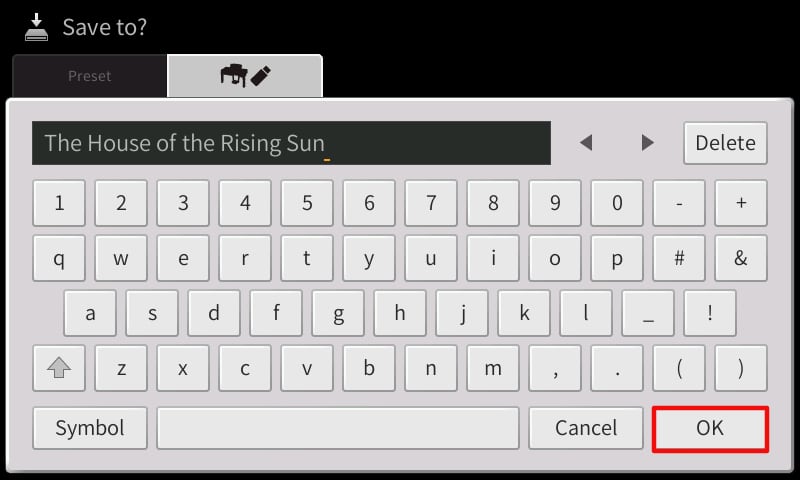
- Enter the name of the piece - in this case - The House of the Rising Sun and then touch Enter.
- Press Home.
Loading the Saved Registration Data from the USB to Internal Memory
Now that this is saved to the USB, this registration data can be recalled at any time in the future but pressing the REGIST BANK - & + buttons together and selecting the registration saved. Then just press with Registration Memory 1 or Registration Memory 2 to load the setup.